The Basic Frame/ Chassis
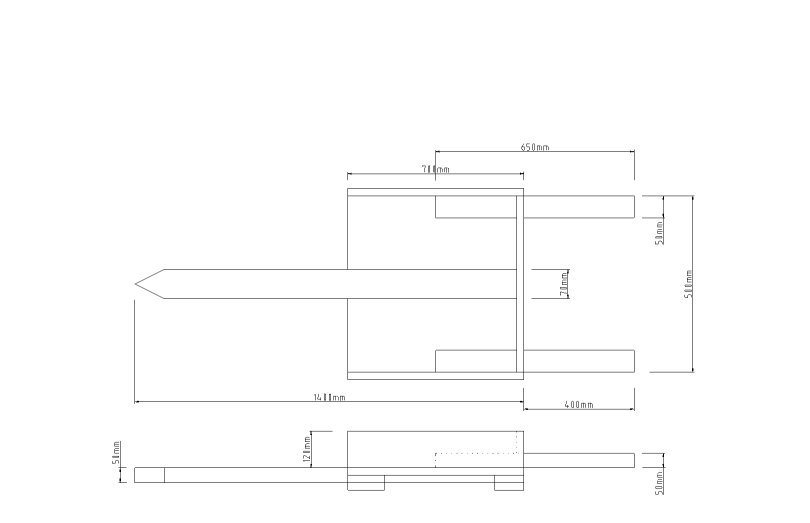
As this been a basic/ simplified Kart the main chassis has to be made from timber. Below are fairly technical plans on the main bulk part of the kart chassis. They are a "tad" difficult to follow at first. It is more focused on the one I built a few years ago. However as I said before, feel free to make adaptations to this design as they may work better for your individual requirements e.g.. height etc. I used material I had lying around the house. I cannot see any reason why one cannot use a sheet of 25mm (1") plywood, with the necessary bushings etc. for the rear axle.
Taking a look at the picture of the plan below, basically all you are seeing is a main part for sitting on with pieces coming out to the back to accommodate the engine with a middle main piece to connect the front wheels out the front. If you are confused take another look at the main plan of the kart here. Plan of the Kart.

On the picture of the kart above there are a rough guideline of the necessary measurements. I have made the kart myself a few years ago and I forget the precise measurements. In high and sight I cannot see no reason for having instead a piece of ply with a 3"x2" (50mmx75mm) for connecting the front wheels and two pieces of 2"x2" (25mmx25mm) at the rear for accommodating the engine.
(Apologies again for "AutoCAD's Export", measurements are a bit unclear, download the jpeg file and zoom in on the picture in any paint program.)
Mainly three inch nails are used in the construction of this chassis and clinched (bent over) everywhere to provide extra strength and to save some blood!. Where appropriate two inch nails can be used. There again if you have a load of free screws, there's no problem with them. And remember if a nail goes wrong, buckles etc. remove it and replace with a new nail.
Any type of wood can be used, basically any spare timber lying around, but make sure it is not infested with woodworm, beetles, wet rot ready to fall apart and crack with you on it at 30mph!.